When I design an iPhone app I tend to use Interface Builder. However, I always forget how to actually connect the widgets (buttons, labels and so on) in Interface Builder to variables I can reference in my Objective-C code in Xcode. Hence this post. Note that this is one approach, there are several others. However, the procedure I describe below is beneficial as it is quite simple, yet usually all that is required.
Step 1. Design some widgets using Interface Builder
The way I usually do it is to simply start a new project, open the Resources tab in the Groups & Files sidebar, and then double-click on a pre-generated Interface Builder XIB file (for example, MainView.xib).
(Note: The screen captures and code fragments I will show below are from a simple project that was automatically generated from the Utility Application code template provided by Apple. A Utility Application project has two default views: a MainView and a FlipsideView. The procedure I describe works for any iPhone application, so if you don’t understand references to FlipsideView and other objects then just ignore them for now.)
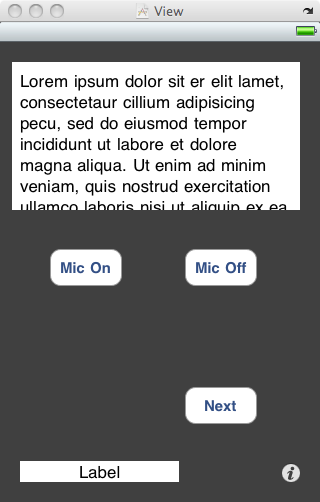
Then I design some rudimentary user interface, like this one (click for a larger image):
Step 2. Create outlets in your code
OK. So we have designed a user interface using Interface Builder. Now, how do we access all these widgets in our code? Here I will describe how we are going to connect the button labeled Next in the above screen capture to a variable named nextBtn.
First, declare the instance variable nextBtn in your interface (for example, MainViewController.h):
@interface MainViewController : UIViewController <FlipsideViewControllerDelegate> {

    UIButton *nextBtn;

}
Below your interface declaration, introduce an outlet that references the instance variable you declared above:
@interface MainViewController : UIViewController <FlipsideViewControllerDelegate> {

    UIButton *nextBtn;

}


@property (nonatomic, retain) IBOutlet UIButton* nextBtn;
You have now declared that your class contains a UIButton instance, and this instance variable can be accessed via an IBOutlet. However, no code has been generated to set the value of this variable yet. To do so, open up the corresponding implementation file (for example, MainViewController.m) and introduce the following line somewhere below the @implementation declaration:
@synthesize nextBtn;
Step 3. Connect Interface Builder widgets to your outlets in Xcode
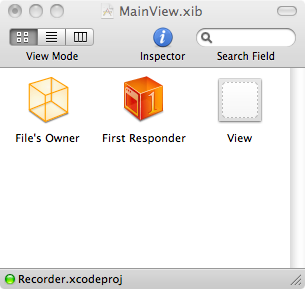
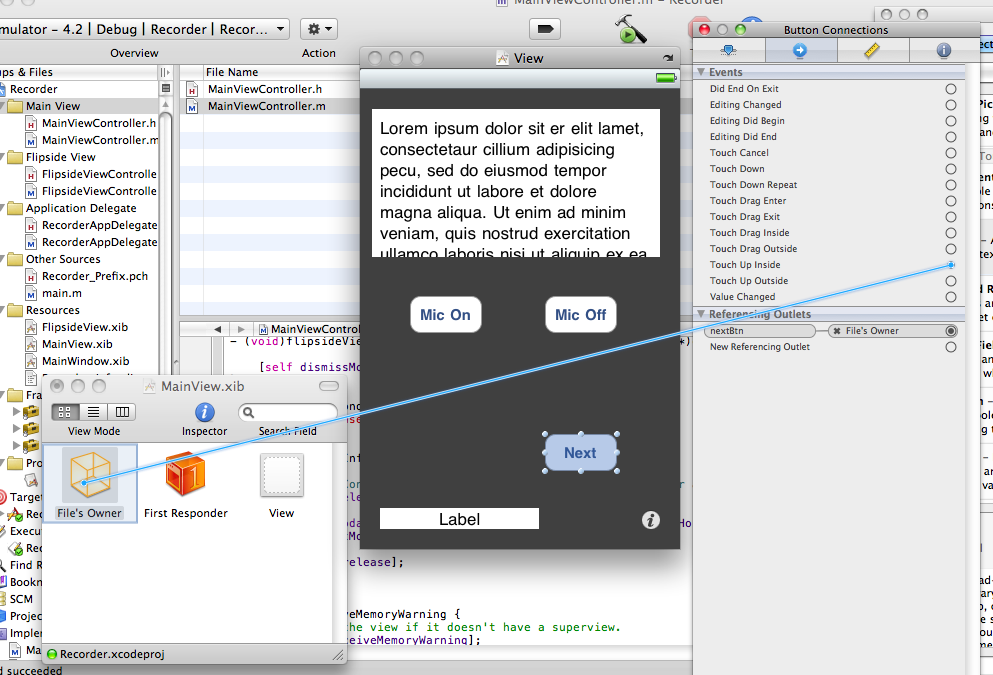
Now that we have created the necessary instance variables and outlets we can open up Interface Builder and connect the widgets to the corresponding variable declarations in the code. First, select File's Owner in Interface Builder’s Inspector window:
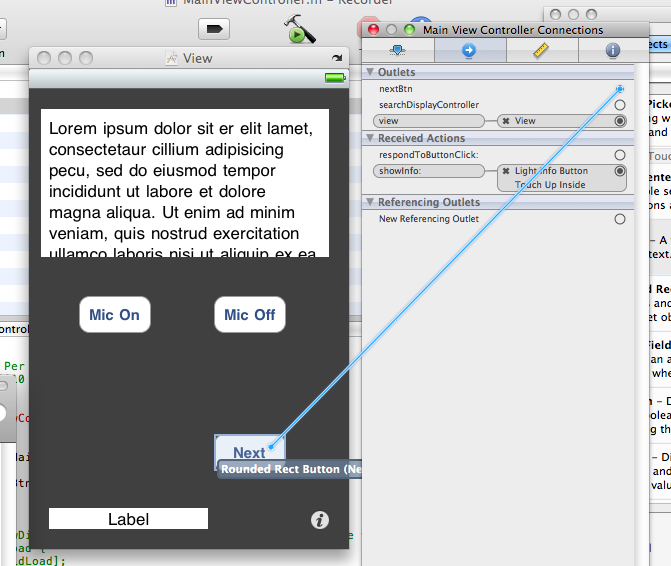
Then open the Connections Inspector (Command-2). In the Outlets section you will see a small connector (circle) to the right of a label named nextBtn. If you hover over the connector it will highlight and turn into a plus-sign. Click it and drag the blue thick line that appears to the button in the interface you wish to connect to nextBtn. See below for an illustration (click to enlarge):
Step 4. Create actions for your Interface Builder widgets
The next step is to implement a method that will be called when an action is triggered for the button. To do this we first add the following function prototype to the header file (for example, MainViewController.h):
- (IBAction)respondToButtonClick:(id)sender;
Thereafter we add a function body to the implementation file (for example, MainViewController.m):
- (IBAction)respondToButtonClick:(id)sender {

    NSLog(@"The user clicked on the nextBtn button!");

}
The code above prints out a message to the console whenever the button labeled Next is pressed by the user (to view the console press Shift-Command-R).
Step 5. Connect Interface Builder widget actions to your designated methods in Xcode
Now we need to tell Interface Builder which function it should call when nextBtn is pressed. Open up Interface Builder again and click on the button in the user interface which we previously connected to the nextBtn variable. The Connections Inspector will change and show you a list of possible actions this button can take. Now click on the connector (circle) for the action Touch Up Inside and drag it to File's Owner in the Inspector (click for a larger image):
A menu will pop up and propose possible methods in your code that could receive the action:
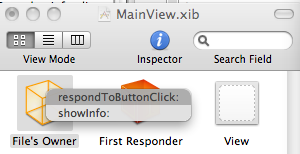
Choose respondToButtonClick:. Then save your interface design in Interface Builder.
All done!
Now we can run the program on an iPhone or via the emulator. Whenever you press the button labeled Next a message appears in the console (click to enlarge):
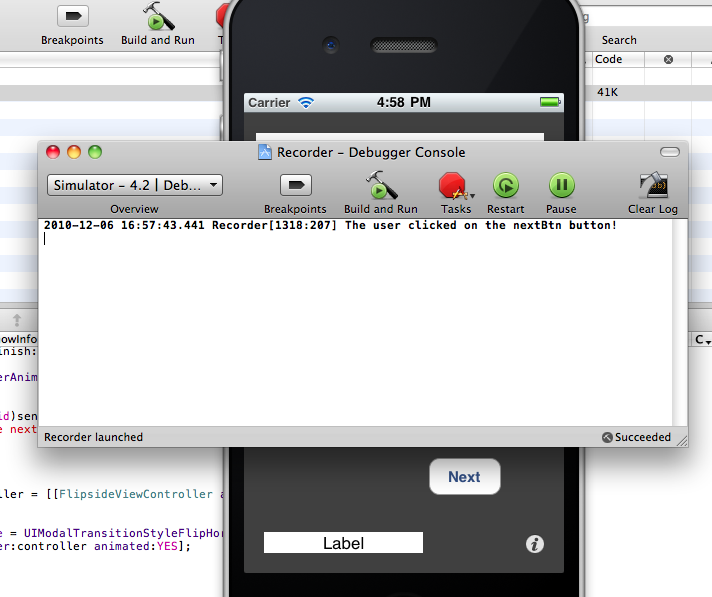
Voila! You can now access the button labeled Next using the nextBtn instance variable in your code. Further, whenever a user presses this button, your method respondToButtonClick: will be invoked and execute any custom code you insert here.
The above procedure used a single button for illustration purposes. However, this procedure generalizes to all widgets and actions supported by Interface Builder. Have fun!
For more information, check out Apple’s own documentation on integrating Interface Builder with Xcode.